
I’m a developer transitioning from using third-party systems to building my own products. This is one of the real-time challenges I solved along the way.
The Problem(s)
I was building a multi-step conversational RAG voice assistant.
The goal sounded simple:
Let users talk naturally
Retrieve relevant knowledge from a dataset
Ask follow-up questions
Trigger APIs
Transfer to a human if needed
But once I started building it piece by piece, the cracks started showing up.
The context broke here and there. The agent struggled keeping up with the retrieval and logic.
Even very low latency started breaking the natural flow of the agent.
My agent struggled whether to fallback or to transfer the call.
My Simple Approach
Instead of rebuilding the entire stack myself, I decided to go with a pre-built solution that will handle my orchestration layer. I chose MirrorFly between MirrorFly, Apphitect and Sendbird. I’ve MirrorFly’s RTC stack before and was confident the solution would work for me well.
In this article you will cover 2 phases:
Agent Creation: how to design the architecture of the AI agent and configure its workflow.
Agent Integration: steps to embed the agent into the app using a custom JavaScript widget.
Part I: Agent Creation
1. Get your credentials
The first thing I did was contacting the MirrorFly team to get my login credentials for the AI agent dashboard.
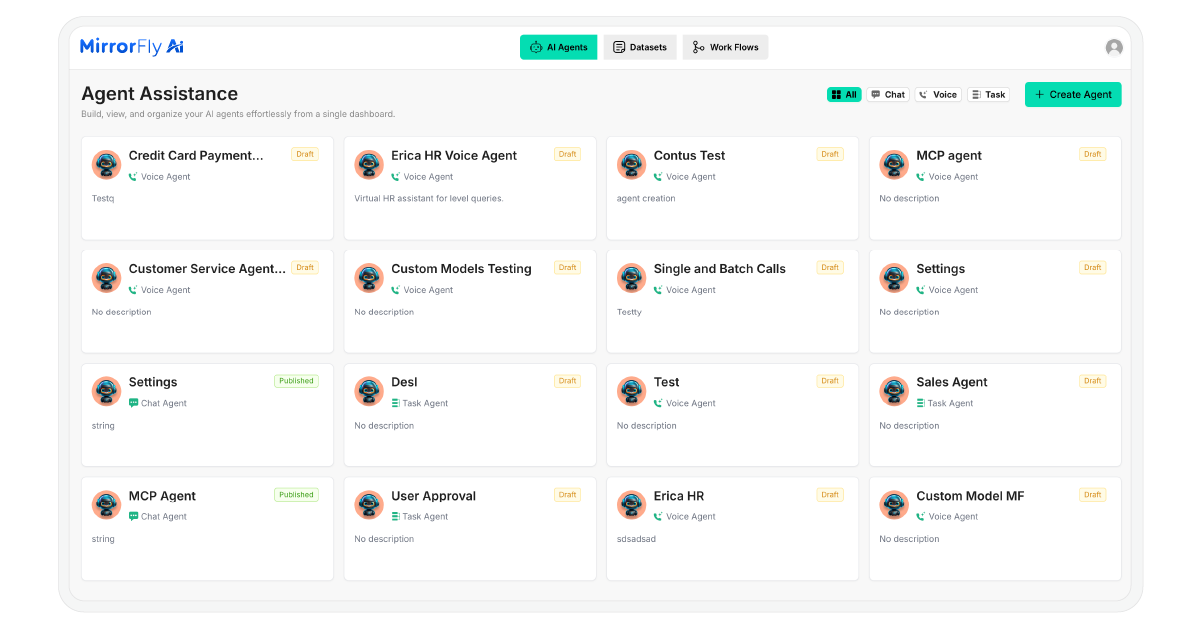
After logging in, I clicked on the ‘Create Agent’ button. I had 3 options: Chabot, Voice Agent and Task Agent. I picked a Voice Agent for my project.
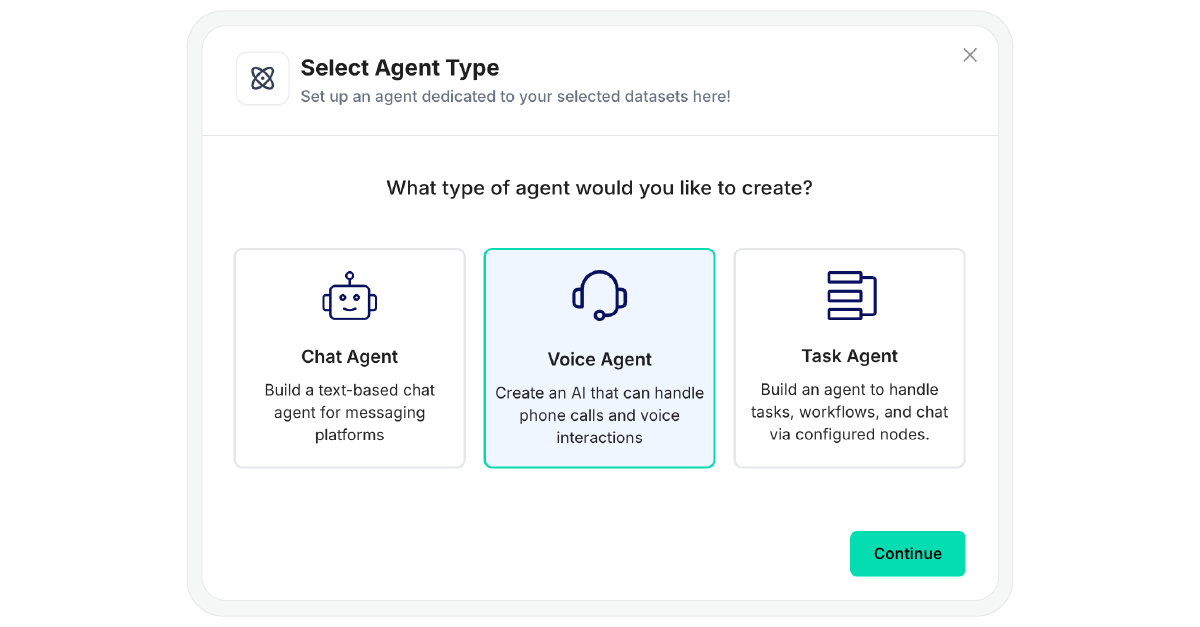
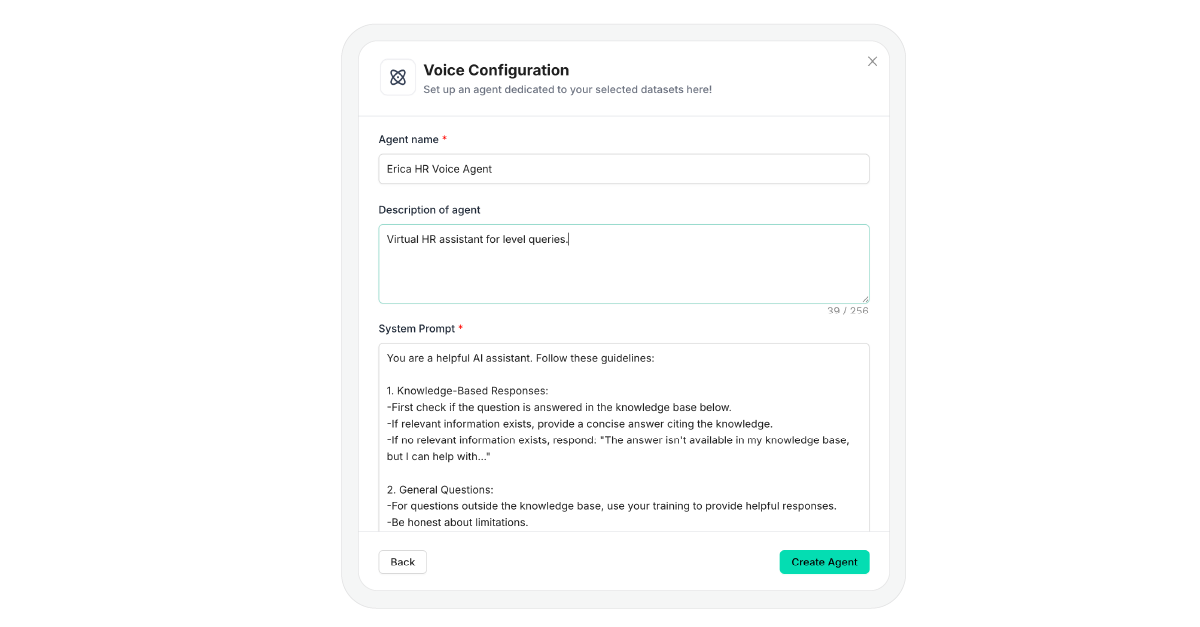
I gave my bot a name and description. Then I defined its guardrails to instruct the bot its responsibilities and how it should interact with our customers.
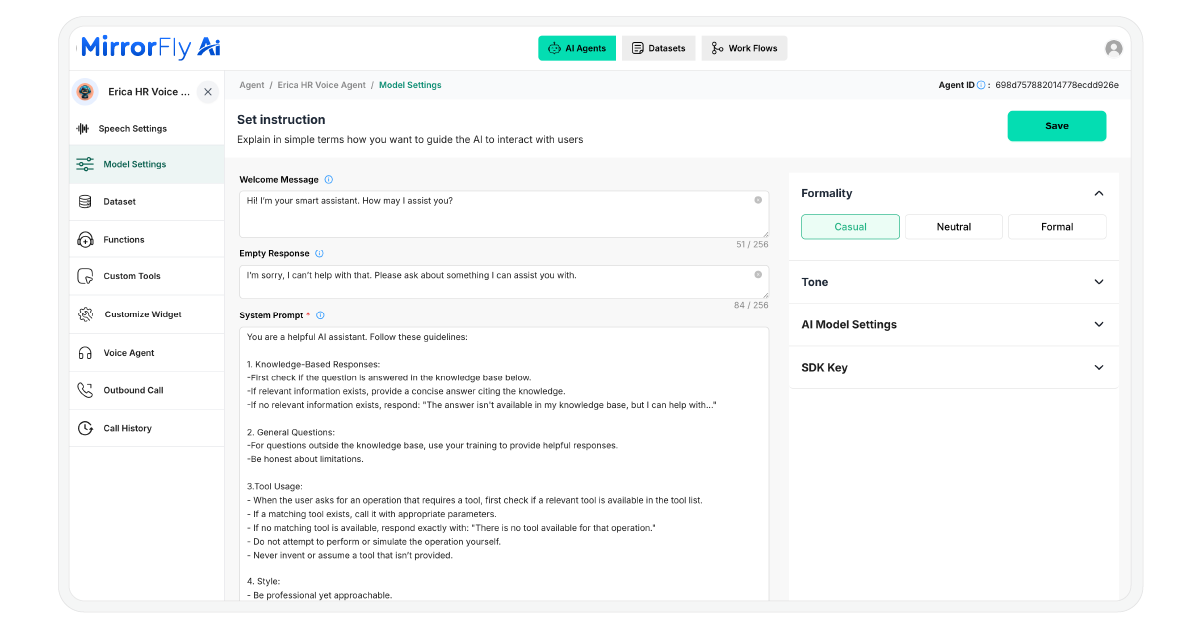
2. Personality & Model Settings
I provided a welcome message that the bot will greet with when the customer begins interacting with it. Also, I defined a fallback response for situations where my agent cannot provide a clear or proper answer.
Next, I adjusted the agent’s tone and formality level.
Then, I chose gpt 4.o from the list of LLM providers. I also noticed that MirrorFly supports Claude. (Will share my experience trying it in another article).
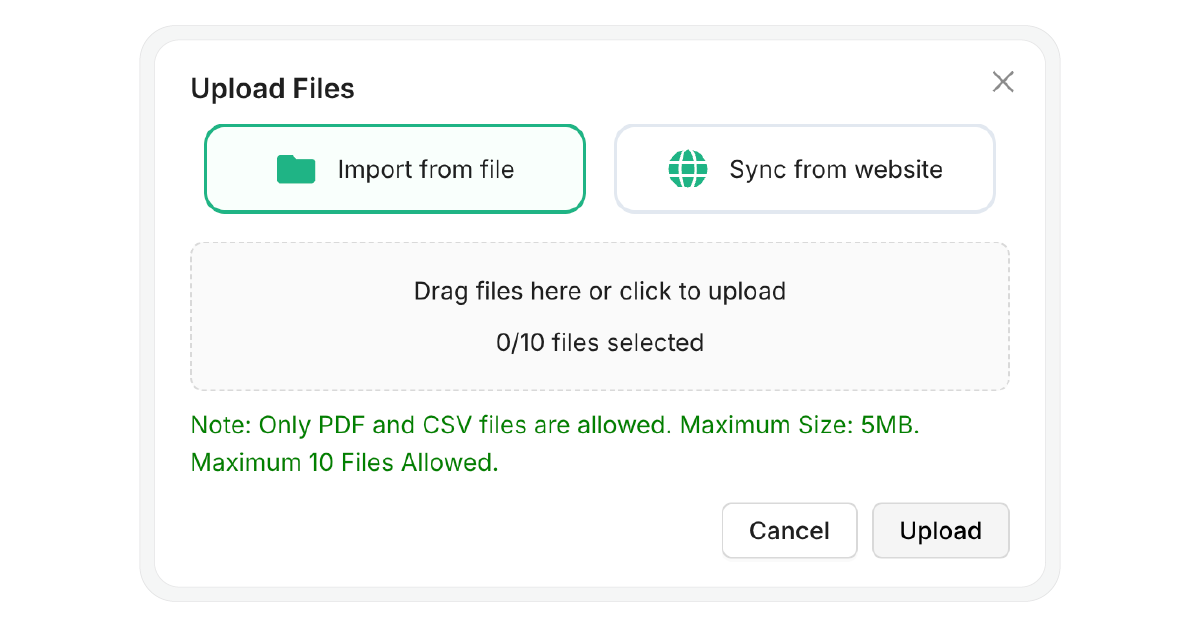
3. Training with RAG (Retrieval-Augmented Generation)
To train my agent, I uploaded our company’s service documents to the dataset. I added a few of them in PDF, some doctors-availability details in CSV and also synced our website with the agent.
4. Workflow Builder
I switched to the workflow builder tab, and started creating my appointment booking workflow. I defined the following:
How the agent’s flow will proceed for queries and the logic it will use for arriving at a decision
When and how to call the APIs and create the booking forms
Triggering actions like email confirmation and delivering messages to the user’s contact number.
5. Speech & Functions
Next, I chose ElevenLabs as my Speech-to-text (STT) with model Scribe V1 and Text-to-speech provider with model Eleven Turbo.
In the same settings, I picked the voice of the agent. I went with Tia for a more conversational tone.
Part II: Agent Integration
Before integration, ensure you have:
A valid Agent ID from the dashboard
An HTTPS-enabled website (required for microphone access)
The latest version of Chrome, Edge, or Safari
1. Install the SDK
I included this script in my HTML file to install the SDK:
<script src="https://d1nzh49hhug3.cloudfront.net/aiVoiceScript/uat/mirrofly/mirror-fly-ai.v1.1.1.js"></script>2. Initialize the Agent
I created a container element and initialized the SDK using my Agent ID:
~~~
// HTML Container
<div id="widget"></div>
// Initialization
MirrorFlyAi.init({
container: "#widget",
agentId: "<YOUR_AGENT_ID>",
title: "Voice Assistant",
theme: "dark",
triggerStartCall: true,
transcriptionEnable: true,
transcriptionInUi: true,
chatEnable: true,
agentConnectionTimeout: 500
});
~~~
3. Handle Callbacks
I monitored the agent’s connection status and captured transcriptions using callbacks:
~~~
const callbacks = {
onTranscription: (data) => console.log("Transcription:", data),
onAgentConnectionState: (state) => console.log("Connection:", state),
onError: (error) => console.error("SDK Error:", error)
~~~
4. Dynamic Agent Switching
I’m planning to create multiple agents, so switch between them, I used the following function:
~~~
function switchAgent(newAgentId) {
MirrorFlyAi.destroy();
document.querySelector("#widget").innerHTML = "";
MirrorFlyAi.init({
container: "#widget",
agentId: newAgentId,
triggerStartCall: true
});
~~~
With these steps completed, my voice agent was completely built and deployed. Want more details? Feel free to comment below.

Related Sources
1. https://dev.to/alexsam986/build-a-custom-ai-voice-agent-using-mirrorfly-rag-393
2. https://github.com/MirrorFly/Custom-AI-Voice-Agent
<scrip src="https://d1nzh49hhug3.cloudfront.net/aiVoiceScript/uat/mirrofly/mirror-fly-ai.v1.1.1.js"></script>
<
script src="https://d1nzh49hhug3.cloudfront.net/aiVoiceScript/uat/mirrofly/mirror-fly-ai.v1.1.1.js"></