
Ask someone to fill the frame with a face, and they may walk straight toward it. The composition becomes tighter, but another change happens at the same time: the camera sees the face from a different perspective.
The nose can look more prominent relative to the cheeks. The ears may seem to recede. A portrait can therefore be sharp, correctly exposed, and noticeably different from a picture taken farther away.
To control that result, separate two decisions: where the camera stands and how much of the scene it records. That distinction is useful whether you are choosing a portrait lens or propping a phone on a bookshelf.
Prepared for Looksmax Scale. A related geometry-tool reference follows the tutorial.
Perspective comes from the camera's viewpoint
Imagine photographing two identical cards, one just behind the other. The closer card appears larger. Move the camera farther away and the gap between the cards becomes smaller relative to the total viewing distance, so their apparent sizes become more similar.
A face has a comparable depth arrangement, although its surfaces are curved. The nose, cheeks, eyes, ears, and jaw sit at different distances from the camera. At close range, the differences are proportionally large. From farther back, the differences are proportionally smaller.
For a simplified pinhole camera, an object's projected size is proportional to focal length multiplied by its size and divided by its distance. When comparing two features in the same exposure, the shared focal-length term cancels. Their relative projected sizes still depend on their distances from the viewpoint. This is a geometric explanation, rather than a measurement of any particular person's face.
There are other effects in real photographs. Lens distortion can bend or stretch image regions, and software may correct or reshape them. Perspective and lens distortion can coexist, but they describe different mechanisms. Changing lenses while staying in one position does not undo the perspective associated with that position.
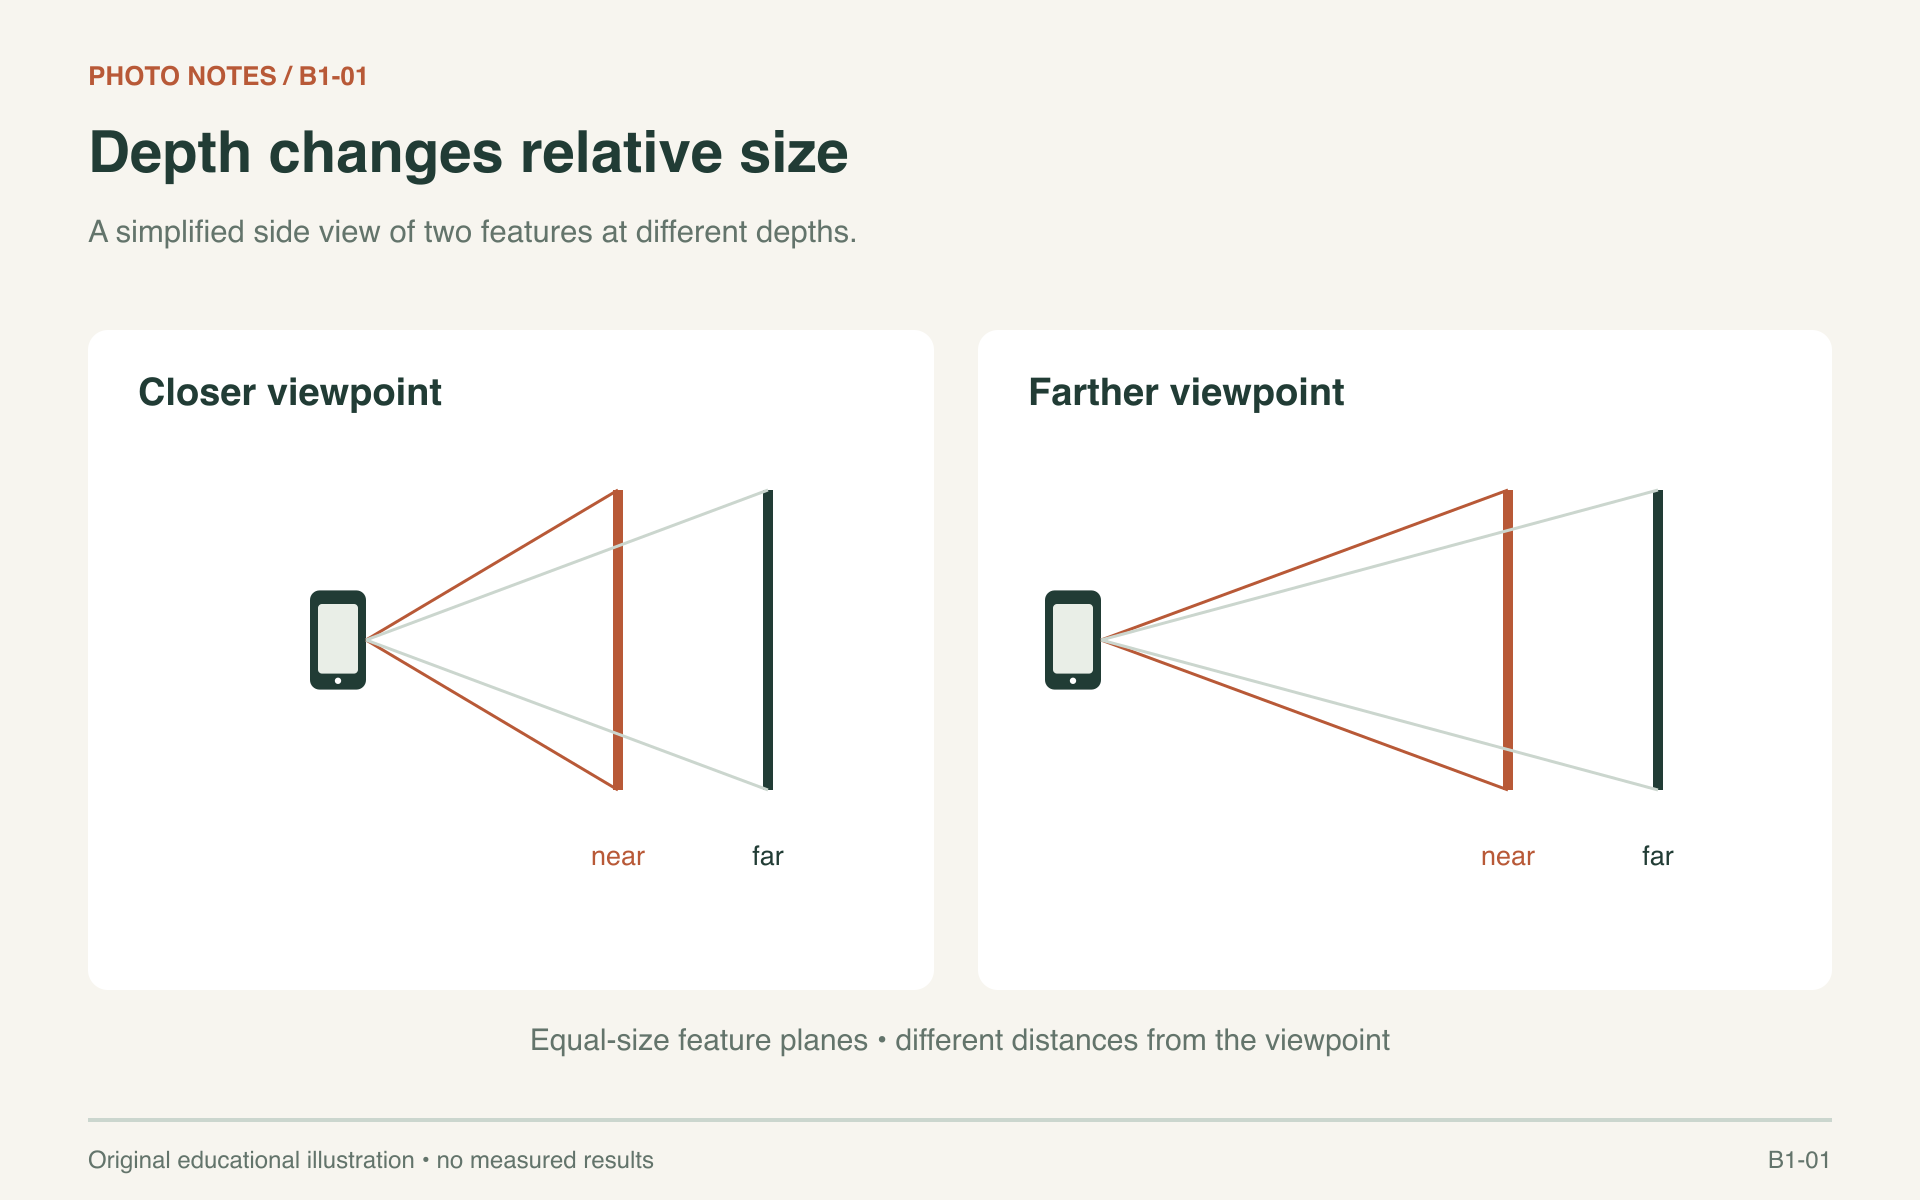
A closer viewpoint increases the relative size difference between near and far features. Simplified geometric schematic, not facial measurements.
Why focal length gets the credit, or the blame
Photographers often describe a wide lens as exaggerating a face and a long lens as flattening it. In everyday use, those observations usually bundle lens choice with camera movement.
To keep a head the same size in the frame, a photographer using a wider angle of view tends to move closer. With a narrower angle of view, the photographer tends to step back. The change in viewpoint creates the perspective difference; the lens makes the desired framing possible from that new position.
Nikon's focal-length guide explains the relationship between focal length and angle of view, including why a telephoto can give a portrait photographer more working distance. The useful sequence is to choose a viewpoint, then choose a focal length or crop that gives the framing you want.
Try this thought experiment: leave the camera on a tripod, change focal length, and crop the wider image to match the tighter one. In an idealized comparison, facial perspective remains the same. Resolution, optical distortion, depth of field, and processing may differ. Those are separate variables to inspect.
On a phone, selecting a zoom label may switch cameras, crop a sensor image, or combine processing methods. Read the camera documentation if that distinction matters to your test. For a simple distance comparison, keep one physical camera active and crop later.
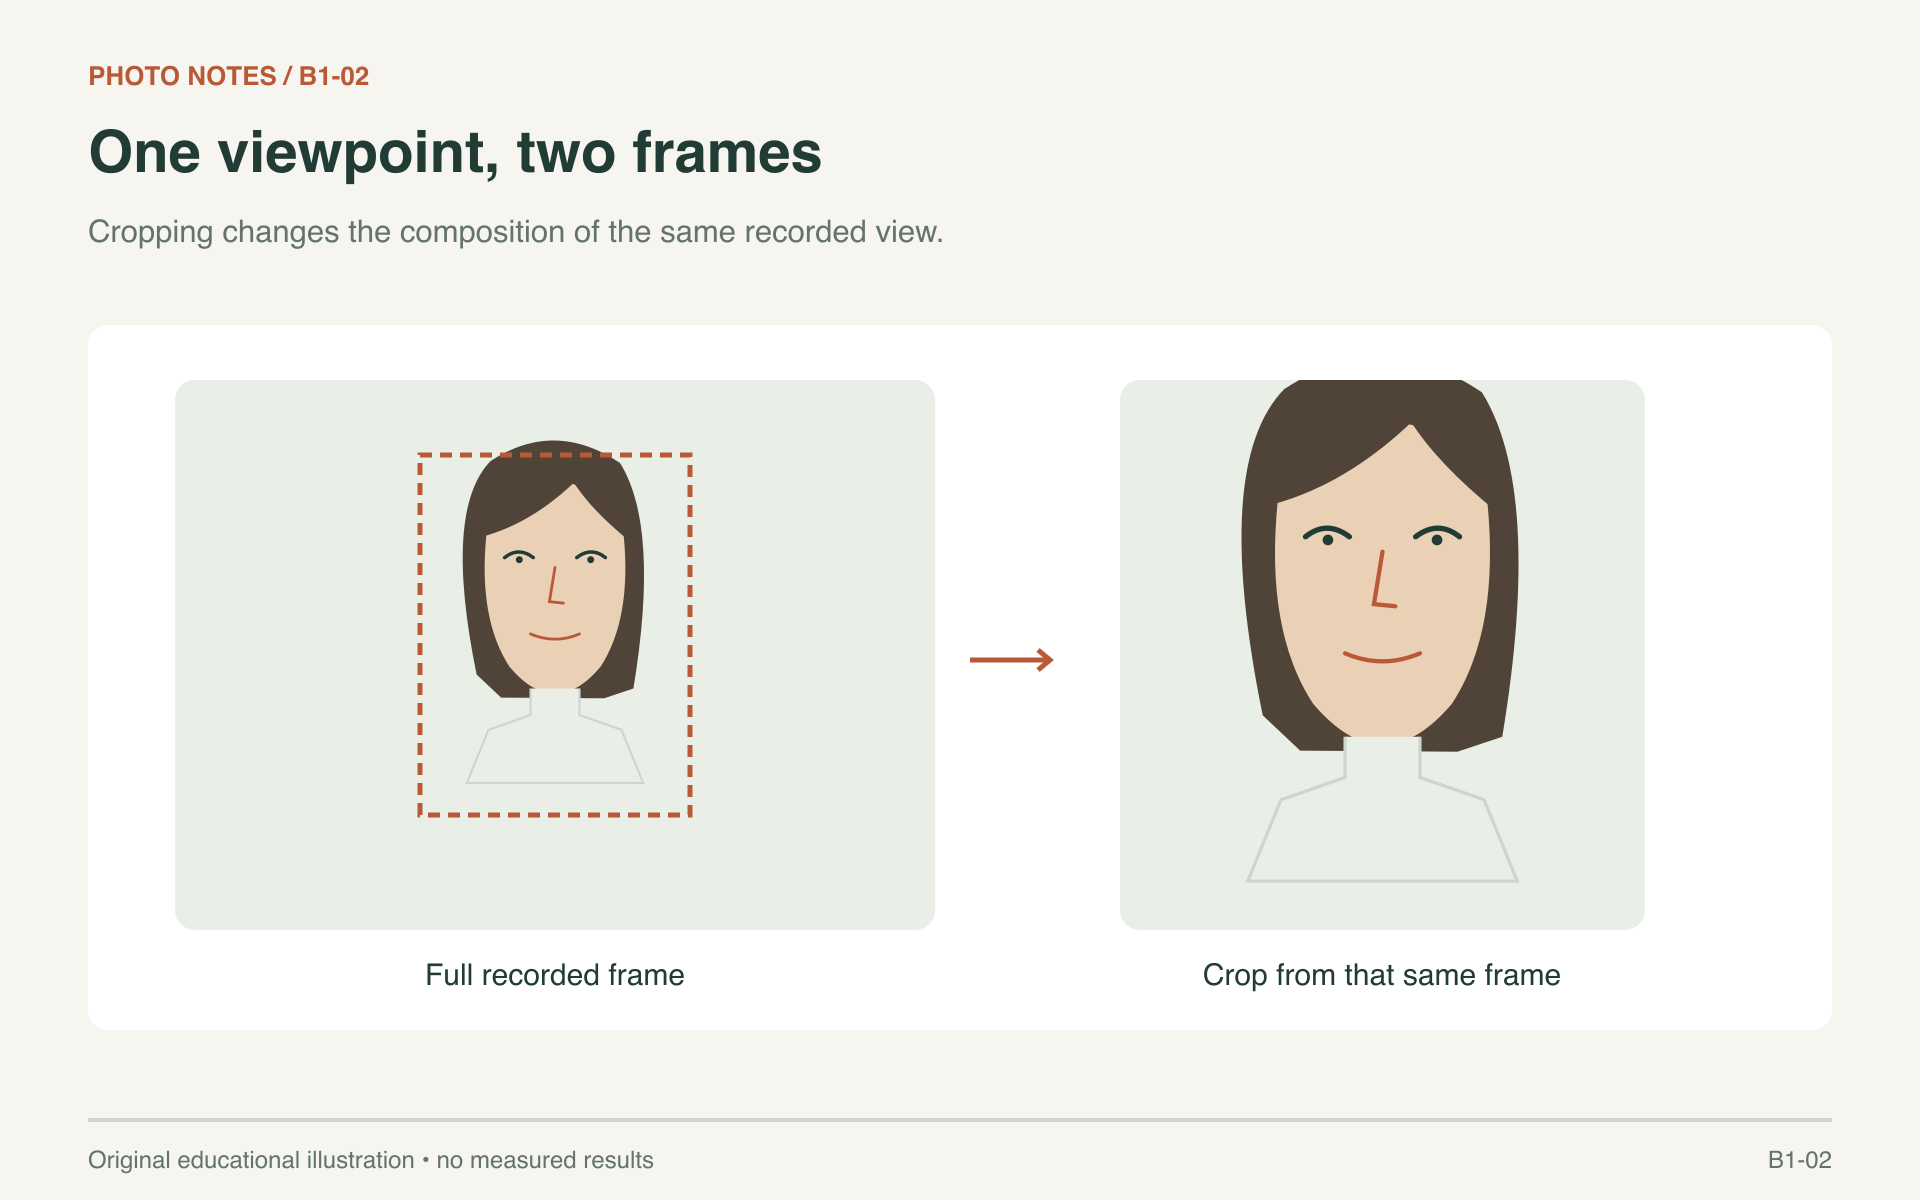
At a fixed viewpoint, a matched crop preserves the recorded perspective. This is an illustration, not a lens experiment.
What the selfie research actually examined
Ward and colleagues' peer-reviewed “Nasal Distortion in Short-Distance Photographs: The Selfie Effect”, published in _JAMA Facial Plastic Surgery_ in 2018, used a mathematical projection model informed by average facial measurements.
At 12 inches, the model estimated apparent nasal widening of about 30% for male measurements and 29% for female measurements relative to an orthographic projection, which represents viewing from infinite distance. At five feet, its estimated difference was negligible. These are modeled relationships under stated assumptions, rather than a rule that every person's selfie enlarges their nose by exactly 30%.
That distinction improves the practical lesson. The paper gives a geometric basis for checking distance when a close portrait looks unfamiliar. It does not establish a universal flattering distance, measure whole-face attractiveness, or show that one camera setting improves dating outcomes.
It also helps separate evidence from illustration. A generated “close selfie” can demonstrate what an effect might resemble, but its geometry may have been invented by the image model. To test camera distance, use actual photographs with recorded camera positions.
Make a useful comparison with equipment you already have
Choose a cooperative adult subject and explain how the images will be used. Set up soft, steady light and put the camera at a repeatable height. Keep the subject looking at the same point with a relaxed expression.
For an illustrative test, mark two or three camera positions you can measure, such as roughly one foot, three feet, and five feet. Choose a reference point, such as the nose tip, and measure to the same marked point on the camera body each time. Record those endpoints so someone else can repeat the setup. These are demonstration distances, not validated beauty targets or an exact replication of the paper's model.
Use this shot plan to keep the two questions separate:
| Pair | Camera position | Framing step | What to inspect |
|---|---|---|---|
| Distance comparison | Move between the marked positions; keep the lens setting fixed | Crop copies to a similar head size | Relative prominence of nose, cheeks, and ears |
| Framing comparison | Leave the camera fixed | Compare the wide original with a tighter crop of that file | Composition changes while the recorded viewpoint stays the same |
The second pair requires only one exposure. It gives you a useful reference for recognizing what cropping alone can change. Keep the distance series separate, and label the original files before making presentation copies.
Use the same camera and lens setting where possible. Keep the face centered and save the full-resolution originals. If the distant frame contains a smaller head, crop it to make the head sizes comparable. Label the distance and crop on each panel. Avoid warping one image to align every facial feature; that can remove the difference you are trying to show.
Inspect nose-to-cheek relationships, visible ears, and the outline of the jaw. Also look for accidental head turns or expression changes. If those moved, reshoot before drawing conclusions. A clean two-panel comparison is more informative than a dramatic collage with several unrecorded differences.
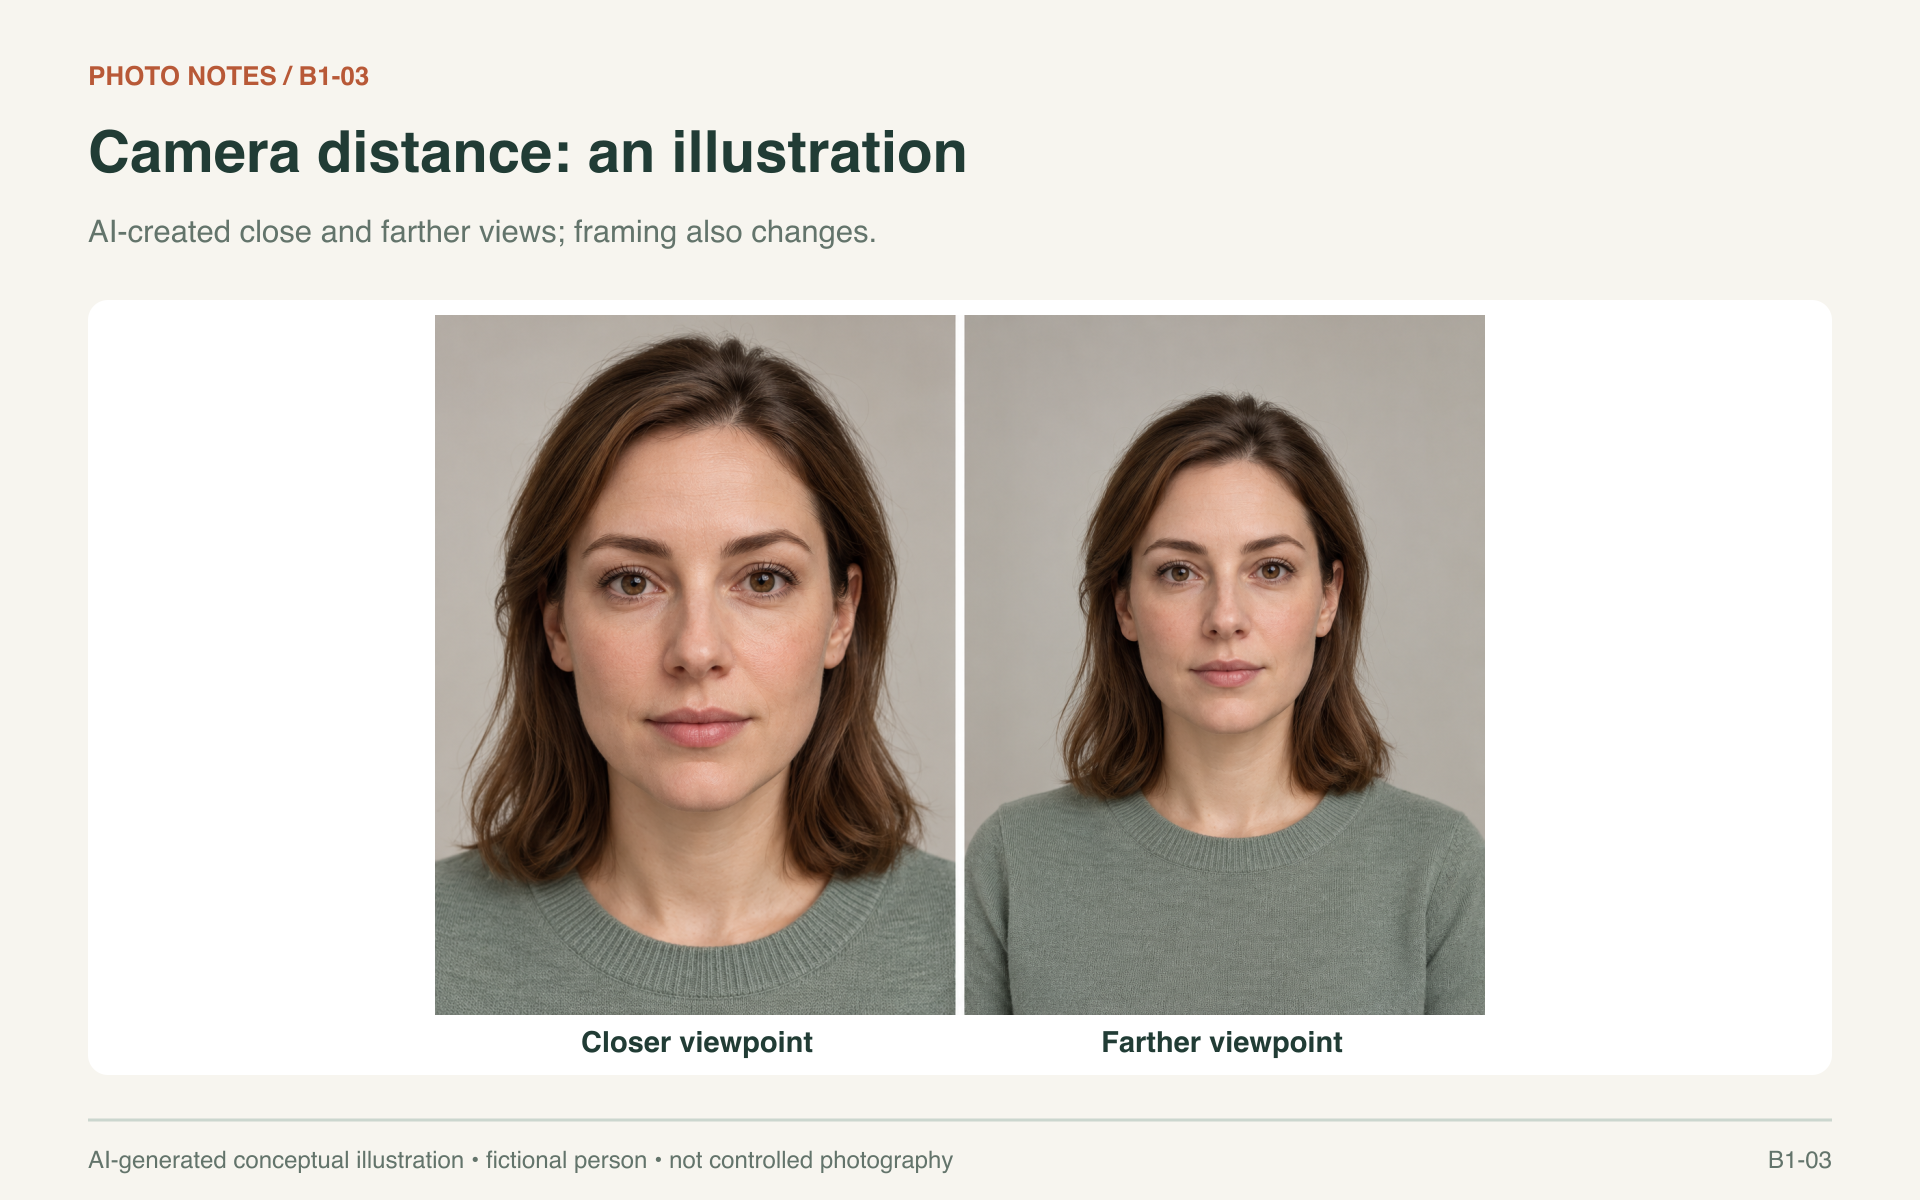
AI-generated conceptual illustration of closer and farther viewpoints. Framing also differs; this fictional comparison is not a controlled optical experiment or measured anatomical change.
Apply the result to your next portrait
For a conventional head-and-shoulders portrait, try beginning several feet away and adjust until you have a comfortable working relationship with the subject. Choose a lens or crop that fits the composition from there. Check whether the eyes retain enough detail and whether the background still contributes to the picture.
Close viewpoints remain useful creative choices. A musician's energetic backstage image and a neutral headshot have different aims. The important decision is whether the perspective helps communicate what you intend.
If you also compare geometric measurements, retain those original photographs and setup notes. A changed score by itself does not identify distance as the cause; the recorded conditions let you investigate that explanation.
Before replacing a camera or buying another lens, repeat a portrait from farther back with the equipment you own. Match the framing afterward and look at what changed. That small exercise makes camera position a deliberate part of your portrait technique.
Disclosure: This article was prepared for Looksmax Scale. Its attractiveness test measures image-based facial geometry, whose inputs can change with perspective.
 Never miss a story from us, get weekly updates in your inbox.